You’ve all glued yourself to those chocolate shop windows with the gorgeous filled truffles, right? You know what I’m talking about… When the shop owner bangs on the window because your face is pressed up against the glass and you’re drooling all of the outside. One of those places.
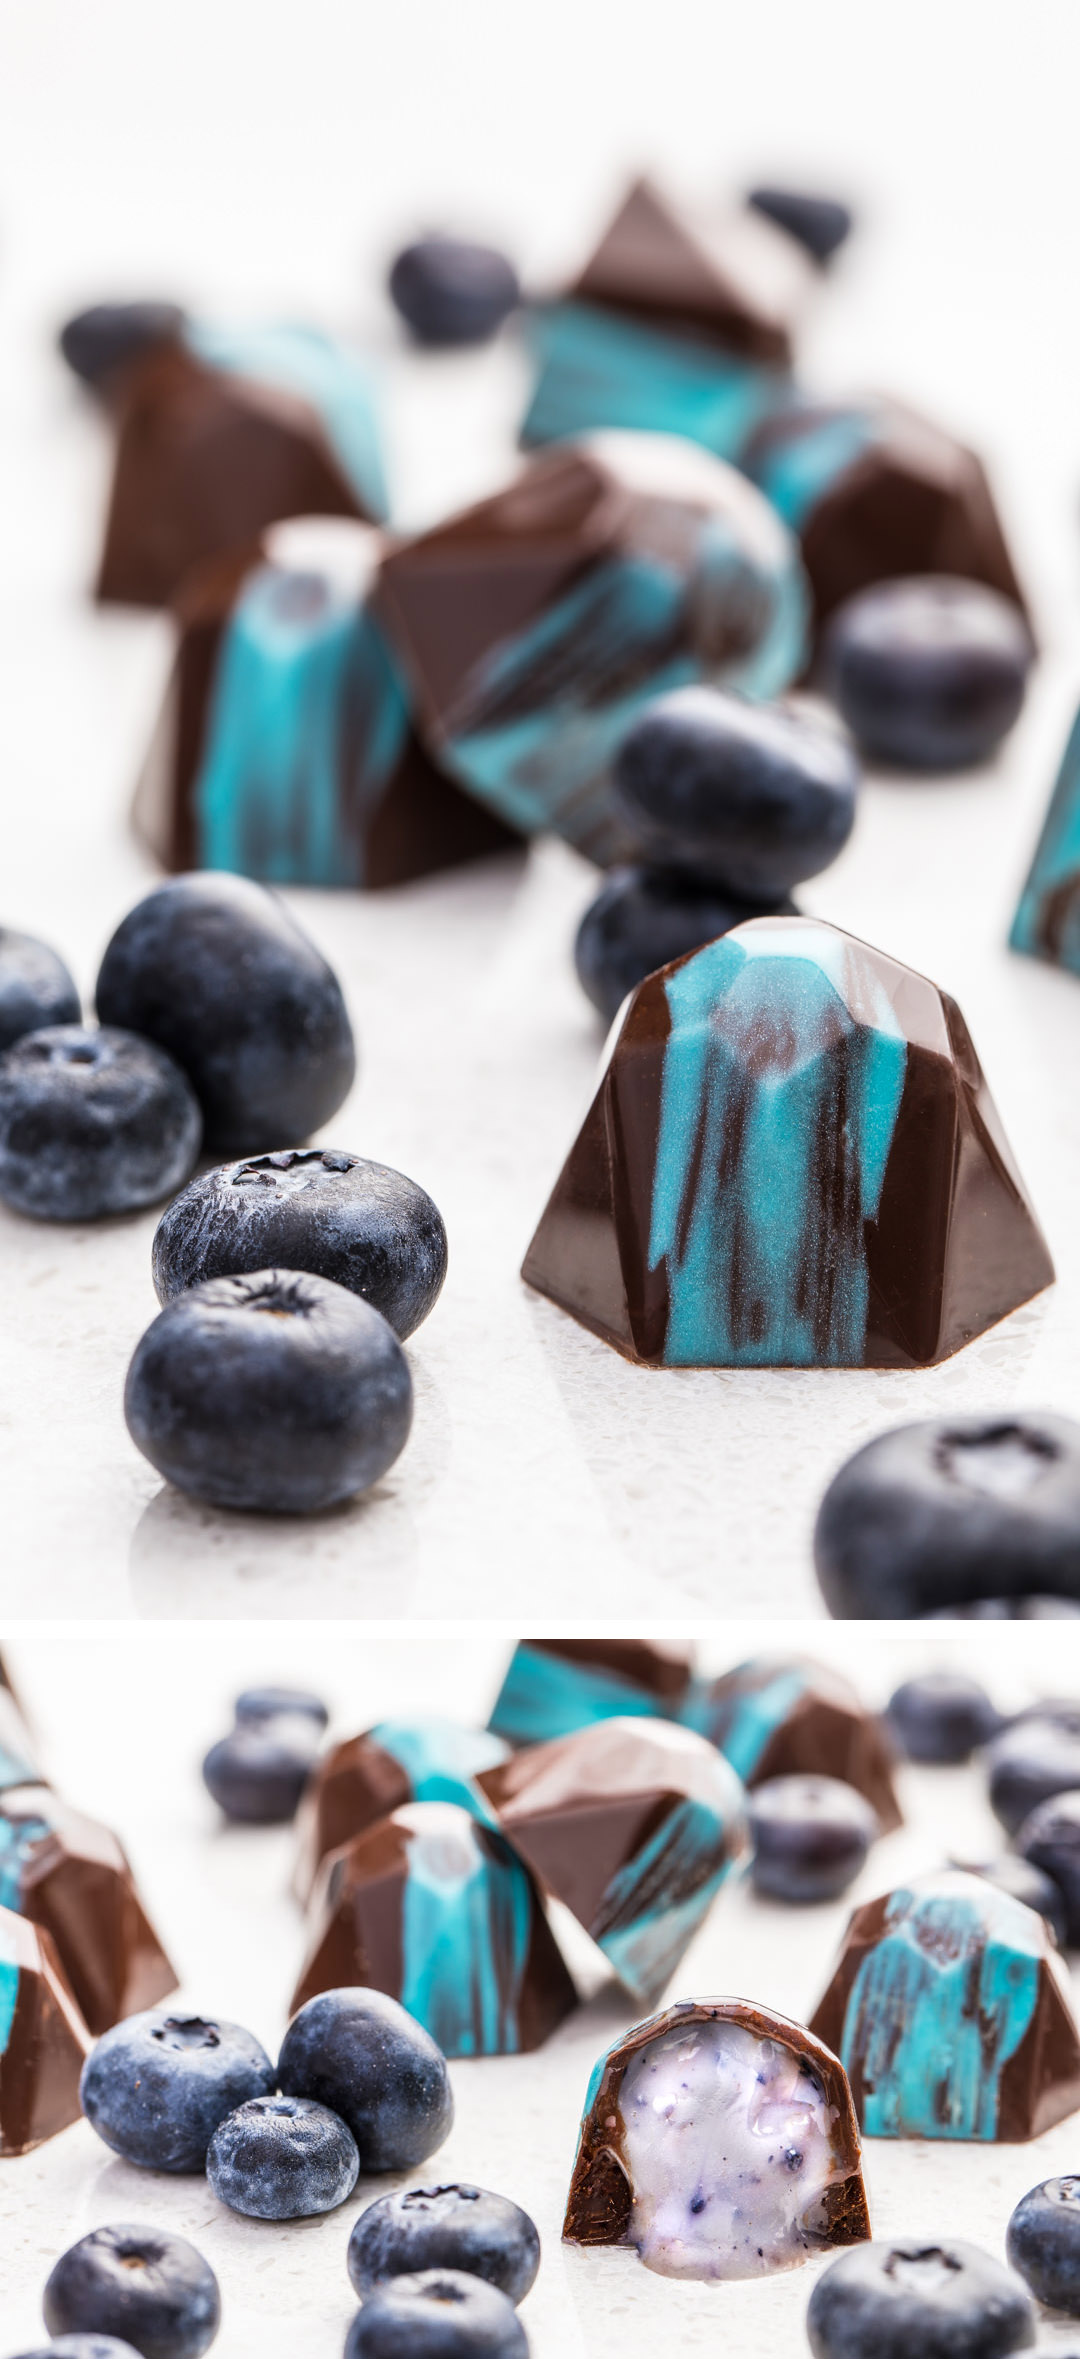
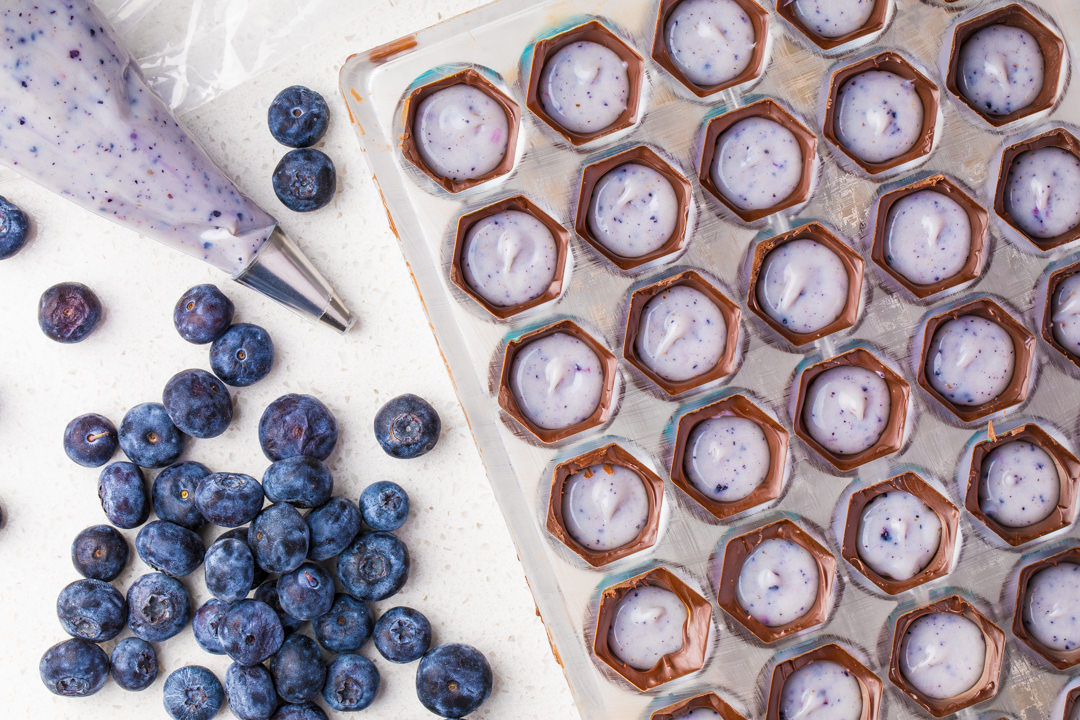
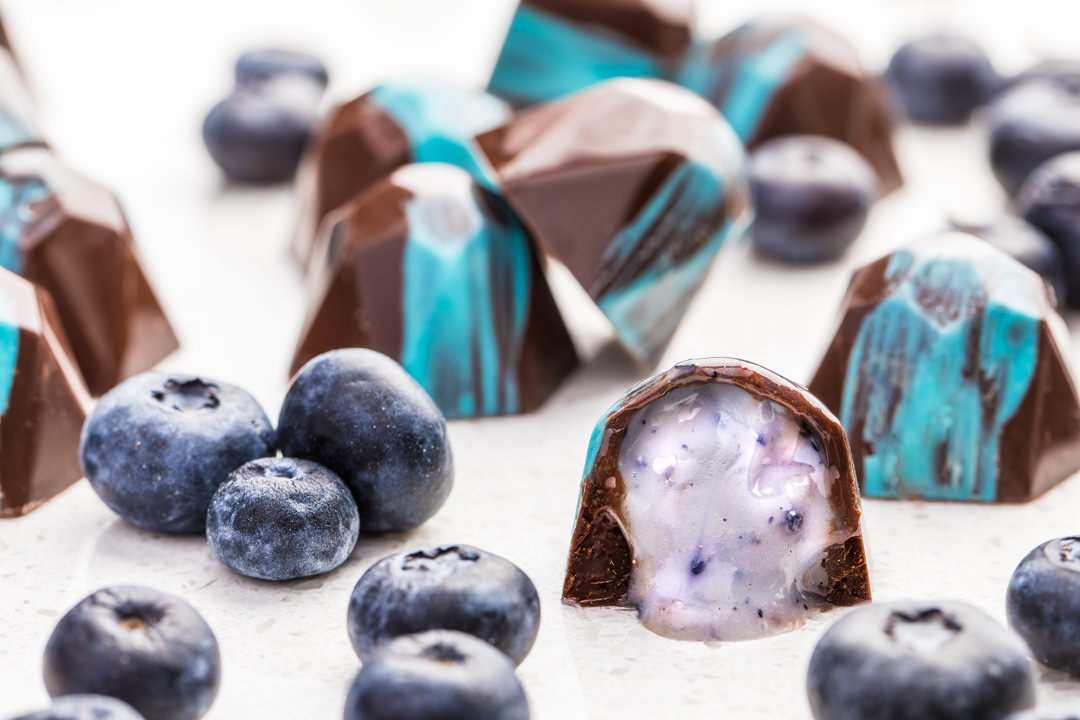
Turns out, they aren’t as hard to make as you may think. With a bit of patience and very simple ingredients, we are going to make some Blueberry White Chocolate Ganache filled Molded Chocolate Truffles.
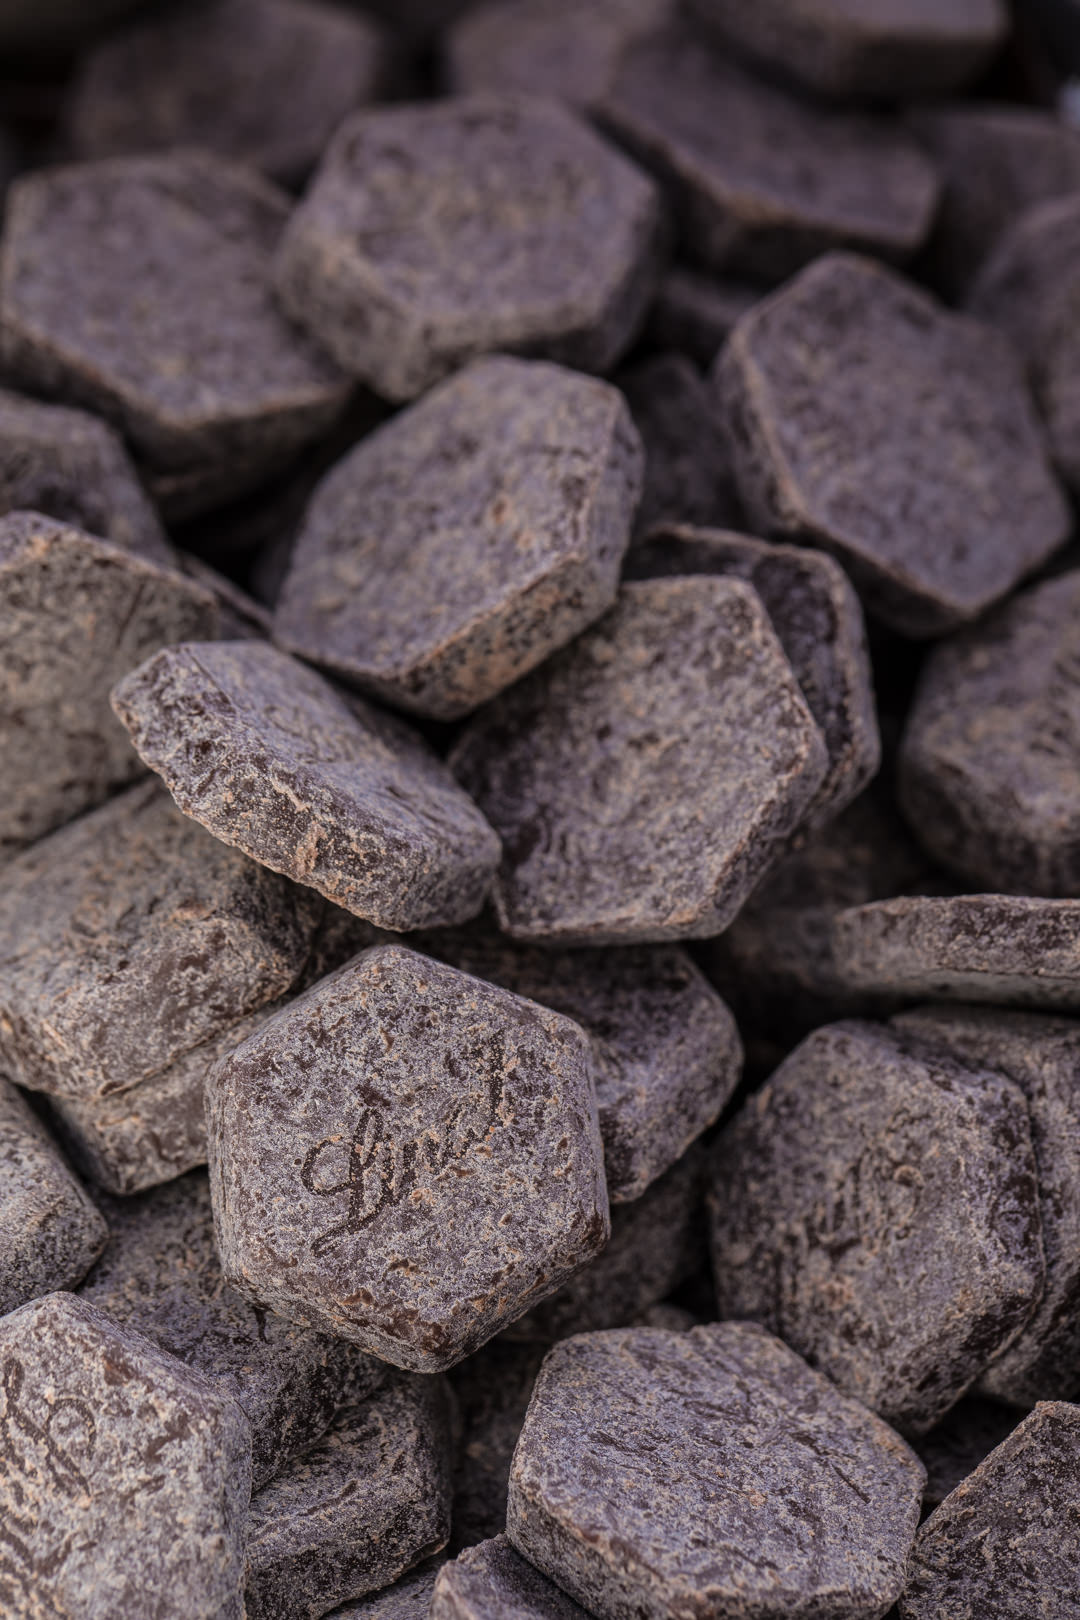
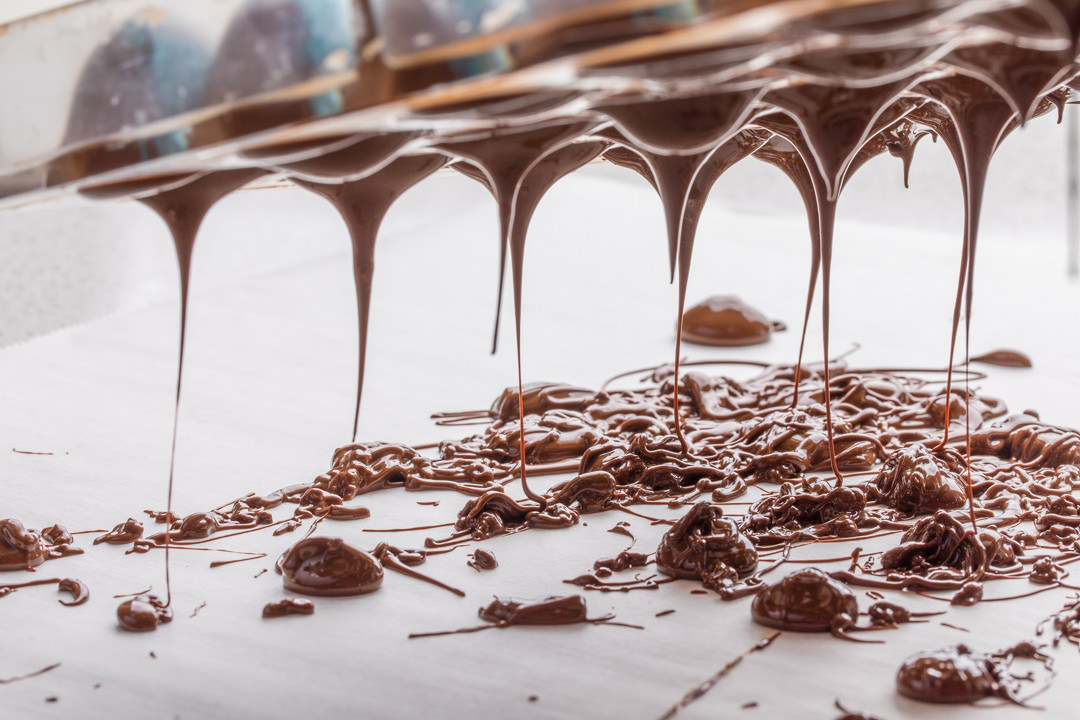
Chocolate that hasn’t been tempered yet.
I have to admit something. Fatty to the confessional booth, please. I don’t really love fresh blueberries. They just don’t seem to have as much flavor as a perfectly ripe raspberry or blackberry.
Sure. I’d rather have a fresh blueberry than broccoli or something similar, but it’s just a mostly overrated fruit in my book. UNTIL now. Who knew that blending it into a bowl full of white chocolate and heavy cream would make it SO delicious?! The blueberry in the filling of these is a bit subtle with the punch of the dark chocolate shell taking the spotlight, but it makes for a vibrant, slightly tart finish to something so rich. Honestly, I like this filling combo better than mixing my favorite fruits into it for that exact reason.
I’ve made quite a bit of molded truffles in the past. I go through these weird phases where I go 200% in on learning some technical skills involved in pastry, tempering chocolate being one that took me a bit longer to nail down that I care to admit. It’s not awful, just very technical. You have to use a thermometer, and you have to pay attention (that’s the hard part for me… I wonder off to watch an endless number of cute YouTube cat videos , to end up letting the chocolate go past the point. I get mad and end up throwing it across my kitchen before going to get a McDouble. Basically my home-baker life cycle in a summary.
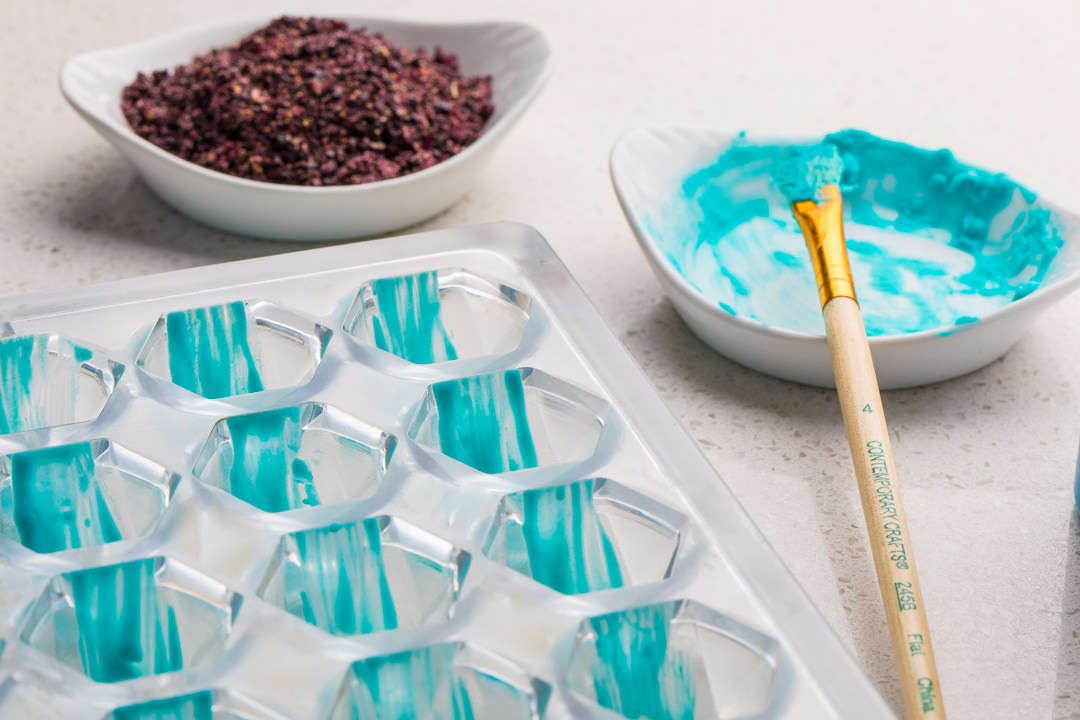
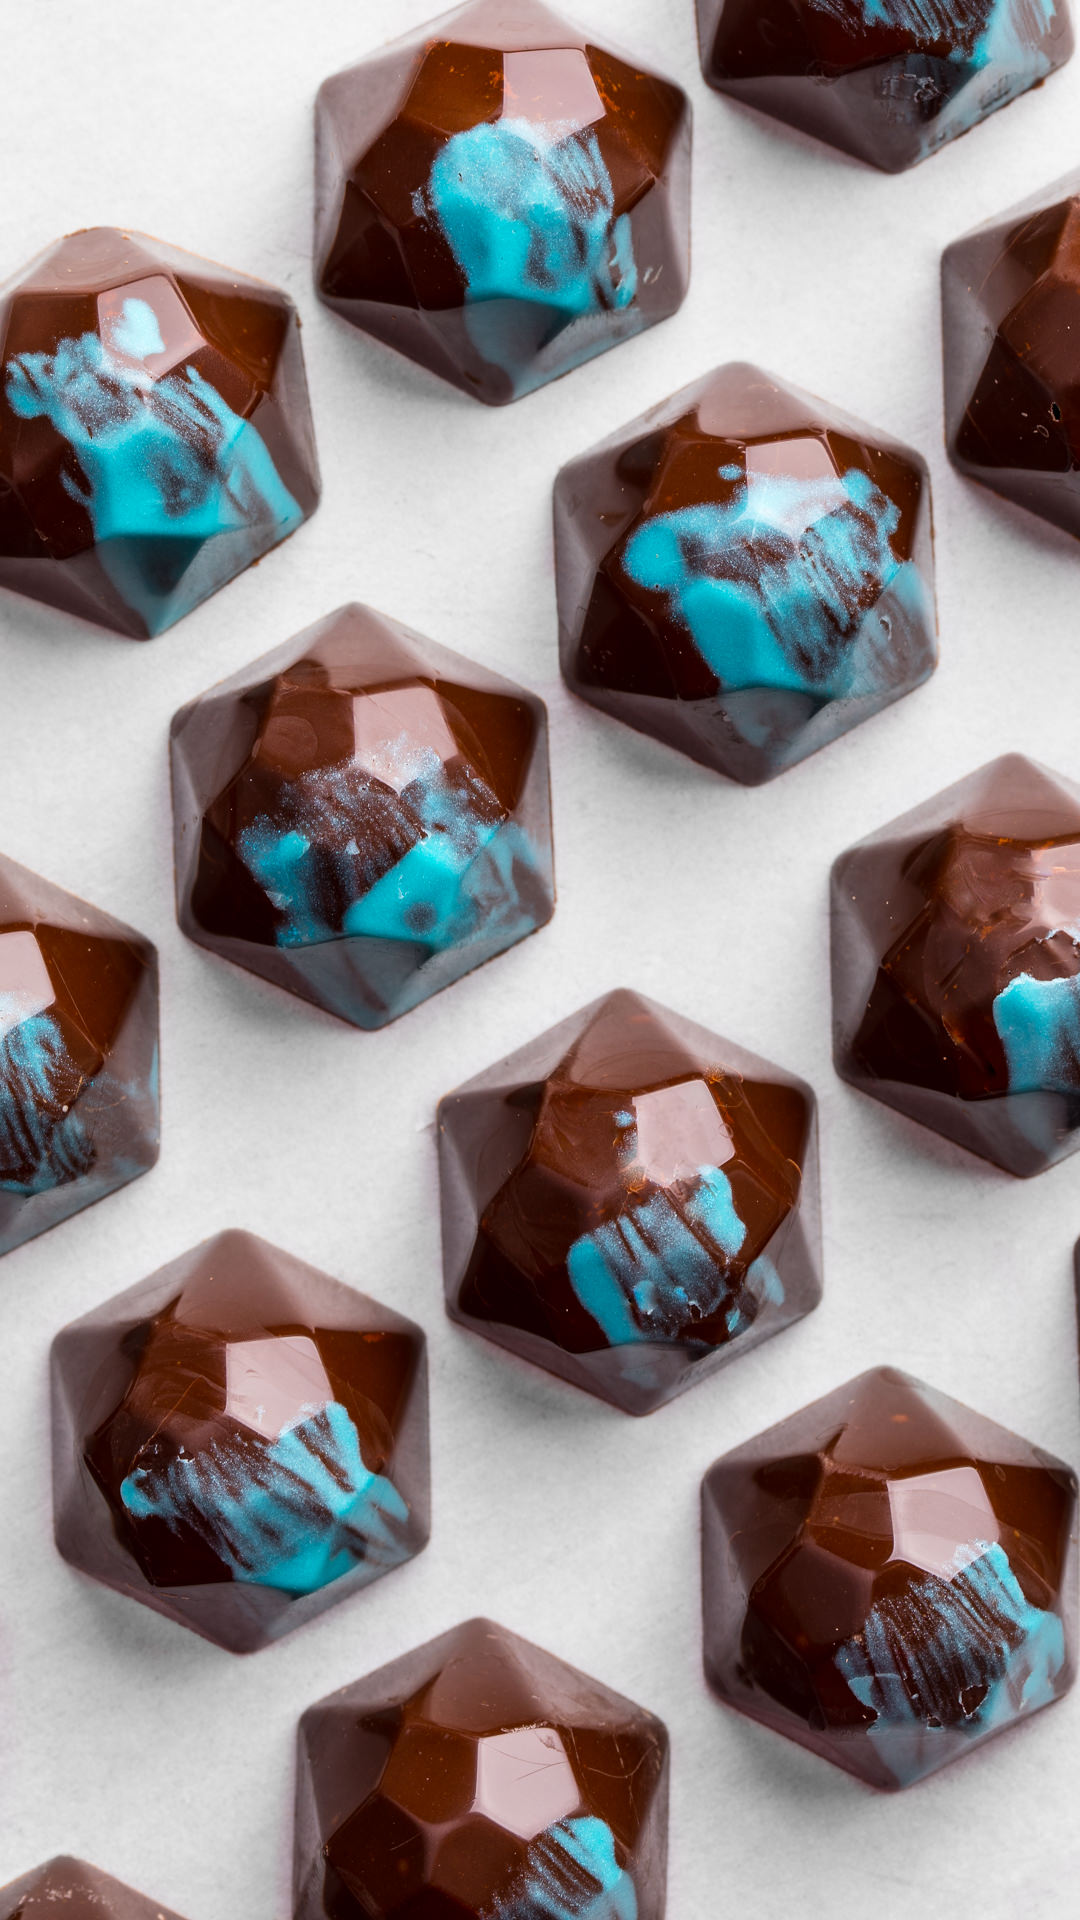
I decided to play around a bit with the outer shell design on these truffles. I’ve done the plain Jane thing with these in the past, but who wants to see all of that boring when you can get your Picasso on and paint by numbers with pretty edible colors?
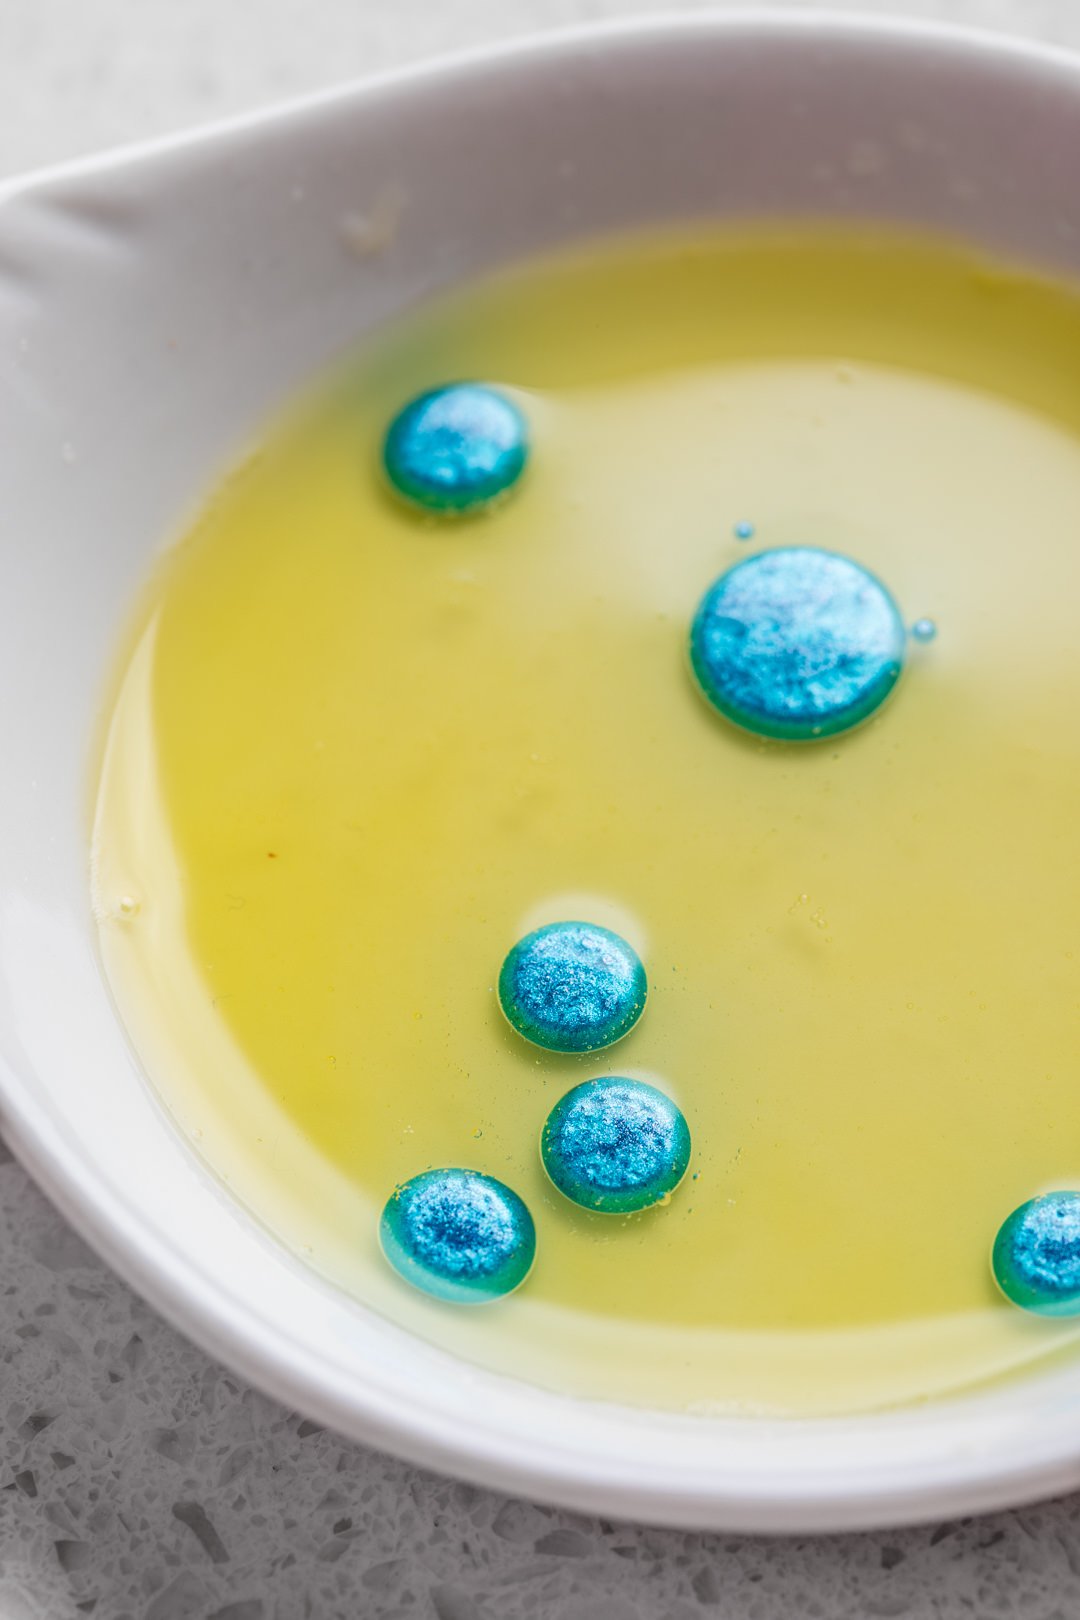
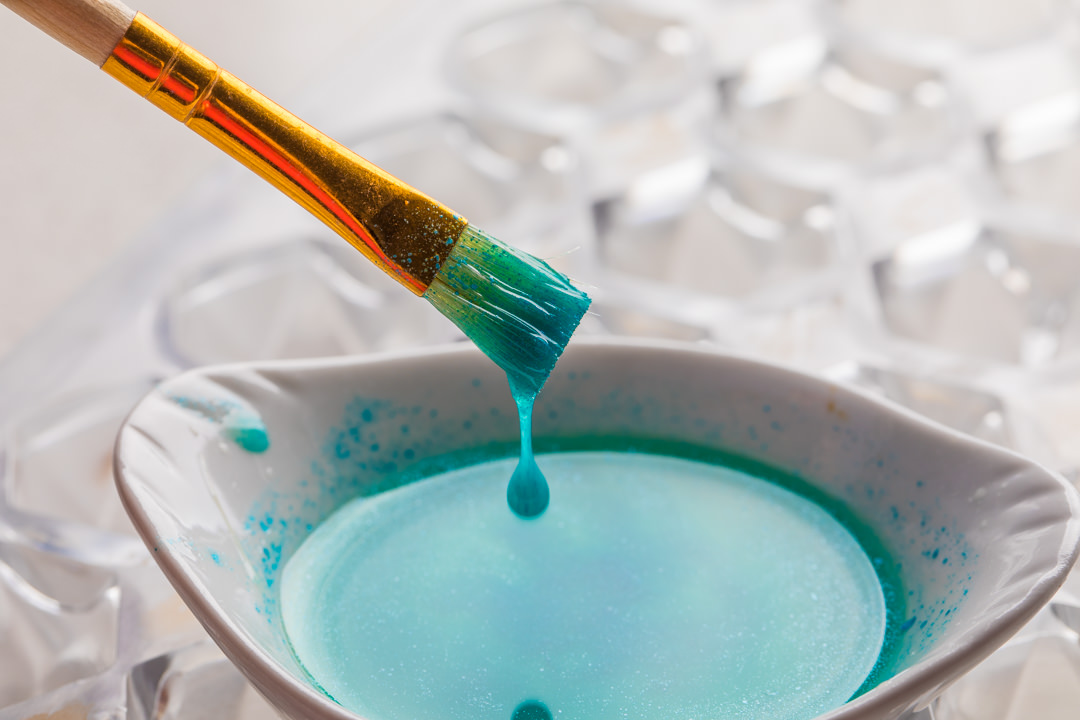
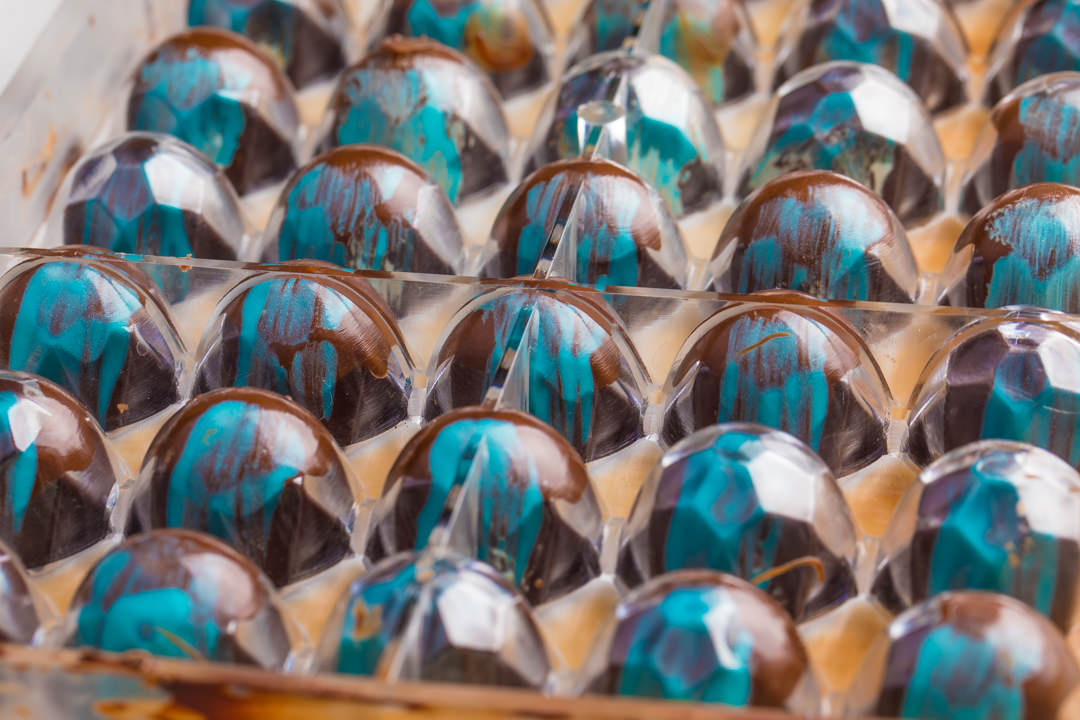
Cocoa butter is the key to this. You can’t plop on some food coloring and expect it to work out. You need simple cocoa butter mixed with an oil-soluble coloring. Sorta. You can see in the photos above that my coloring just beaded up. I tried this with food airbrush coloring because I love, love, love the sheen options in those kits.
Turns out, I should have done a bit more research. While it wasn’t the best option (you really want an oil or fat-soluble food coloring that will incorporate in the cocoa butter, which is oil/fat after all), it actually ended up working well for my use. My home kitchen isn’t exactly the pastry cabinet of Ladurée.
We’ll roll with it. I just made sure that the coloring was very well mixed between every few brushes into the molds. Turned out pretty well, I think. You are left with this super glossy brush stroke that looks like a million bucks. If that presentation isn’t inviting to bite into it to find out what’s inside, you have no soul.
Speaking of the molds… I’m going to save you a shit load of work and tell you exactly what and why you need to get the right stuff in hand before starting this. Remember when I said this wasn’t that difficult. The hardest part of making these is making sure you are equipped with the best tools. Once you’ve got that down, it’s plug and play like Y2K (idk if that makes sense, but it rolled out of my mouth as I was typing and sounded too fun to not include it).
Having been in more kitchen and baking shops than sporting events during my lifetime, I know that you will almost always find those thin plastic chocolate molds as your only option for chocolate molding. Walk in the store, pick up one of those molds, find a lighter or burning candle, and burn it until it no longer exists. Those things are absolutely useless. I suppose you could get them to make simple decorating candies or something, but it’s a disaster for finishing chocolate that you’ve spent all of this time tempering. You’ll be left with a dull, boring, cloudy finish, much like when I’ve tried those painting while drinking cocktails classes. — Walk out and sit in your car to drink your pumpkin spice latte and get on Amazon to order the real deal.
It’s going to cost you a penny or 2,000, but is absolutely worth it. You want a heavy duty, polycarbonate food-safe mold made (click for Amazon link to what I suggest – less than $20) for candy making. I would even recommend picking out just one shape that you like and making everything with it for a while before building up a bit of a stock for others. I promise that nobody will care if the chocolates you are generously giving them are the same shape as last time. They’ll eat it and go home feeling like they haven’t lived their life to the fullest because they don’t know how to make these beautiful treats, but forever be your admirer.
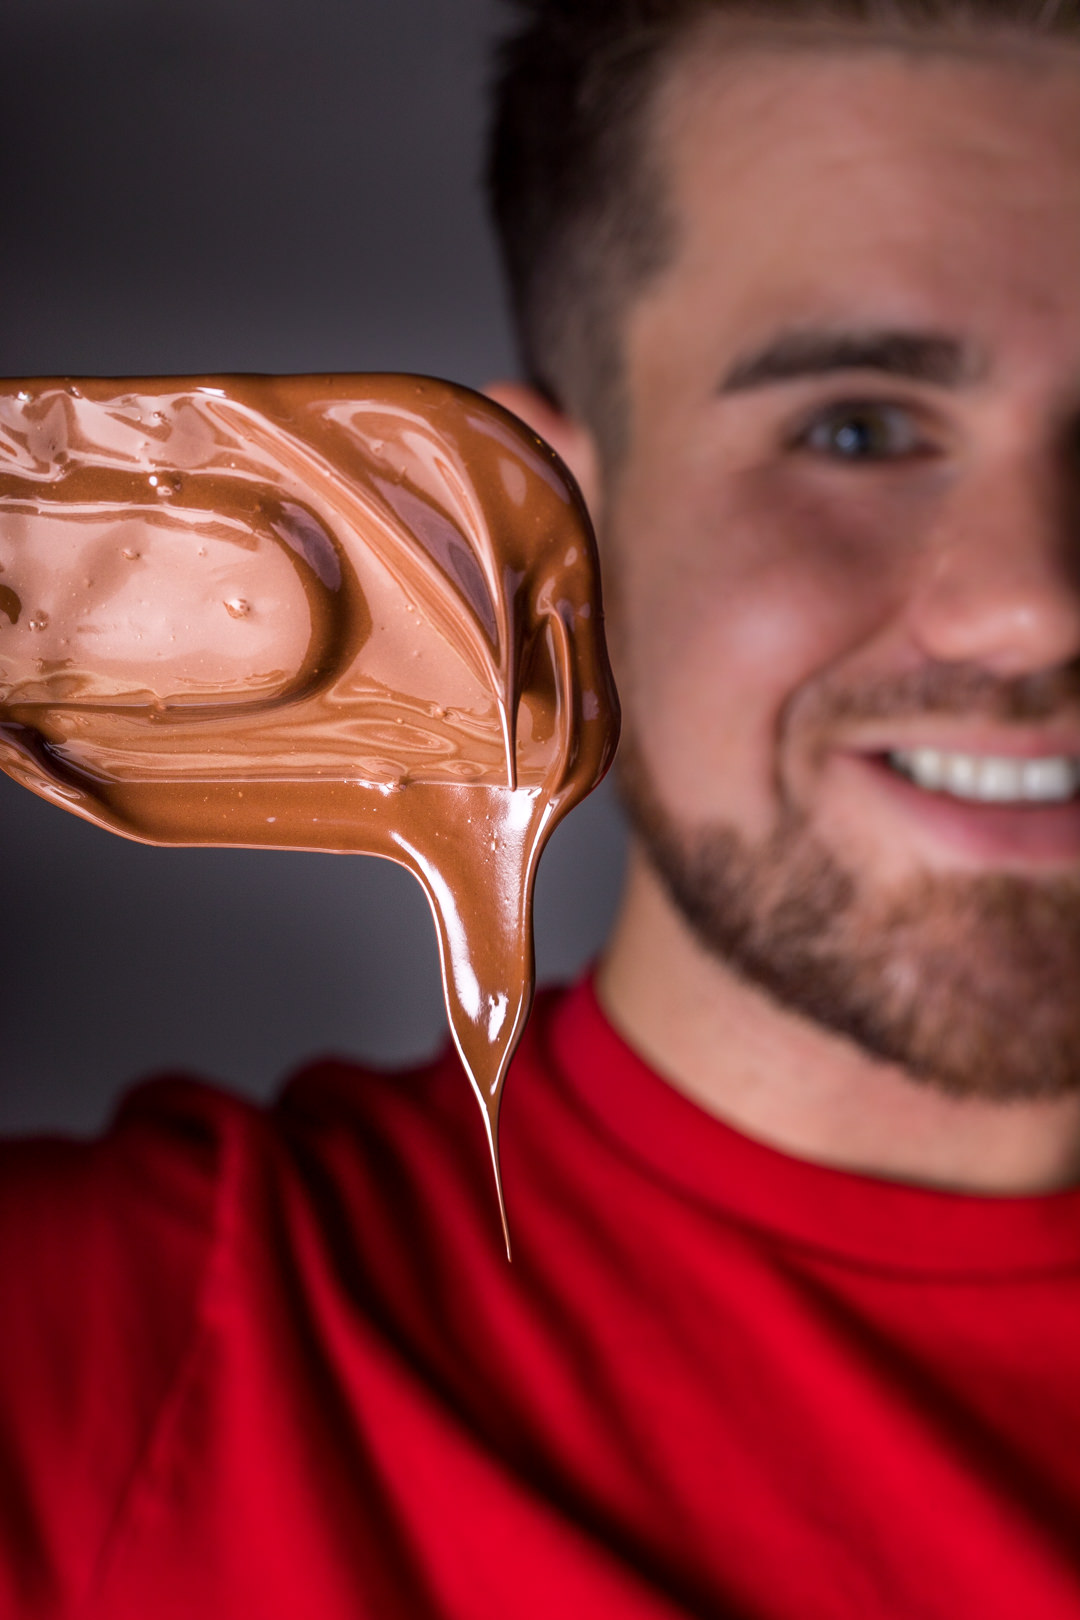


Eventually, I will finish my Tempering 101 Guide, but until then, I would highly recommend that you save yourself a lot of wasted time and anger by reading up a bit on tempering. Tempering is the process of heating and cooling chocolate to go from that matte finish chocolate (like in the photo of the chocolate above) to a glossy, crisp finish with the perfect bite that you expect from a class act candy. Ecole has a great resource to review. Start with the “seeding” method of tempering. Again… get. a. good. thermometer. The two that I often use are this handheld model (there is also a cheaper cousin of this model here), and this infrared thermometer for quick checks. The infrared model has a little laser that you can have the cats chase while you wait. If that isn’t enough motivation to get you to grab one, I don’t know what is.
If you’re looking for a good weekend project, this is a great one for the books. Turn on some Adele, grab a bottle of wine, and take your time with it. I accept samples for product testing. For quality assurance, I mean. Cheers!
- 500 grams dark chocolate
- 125 grams dark chocolate
- 2 tablespoons raw cocoa butter, I use THIS often
- fool coloring, powder is fairly cheap and best for this application
- 200 grams white chocolate
- 200 ml heavy cream
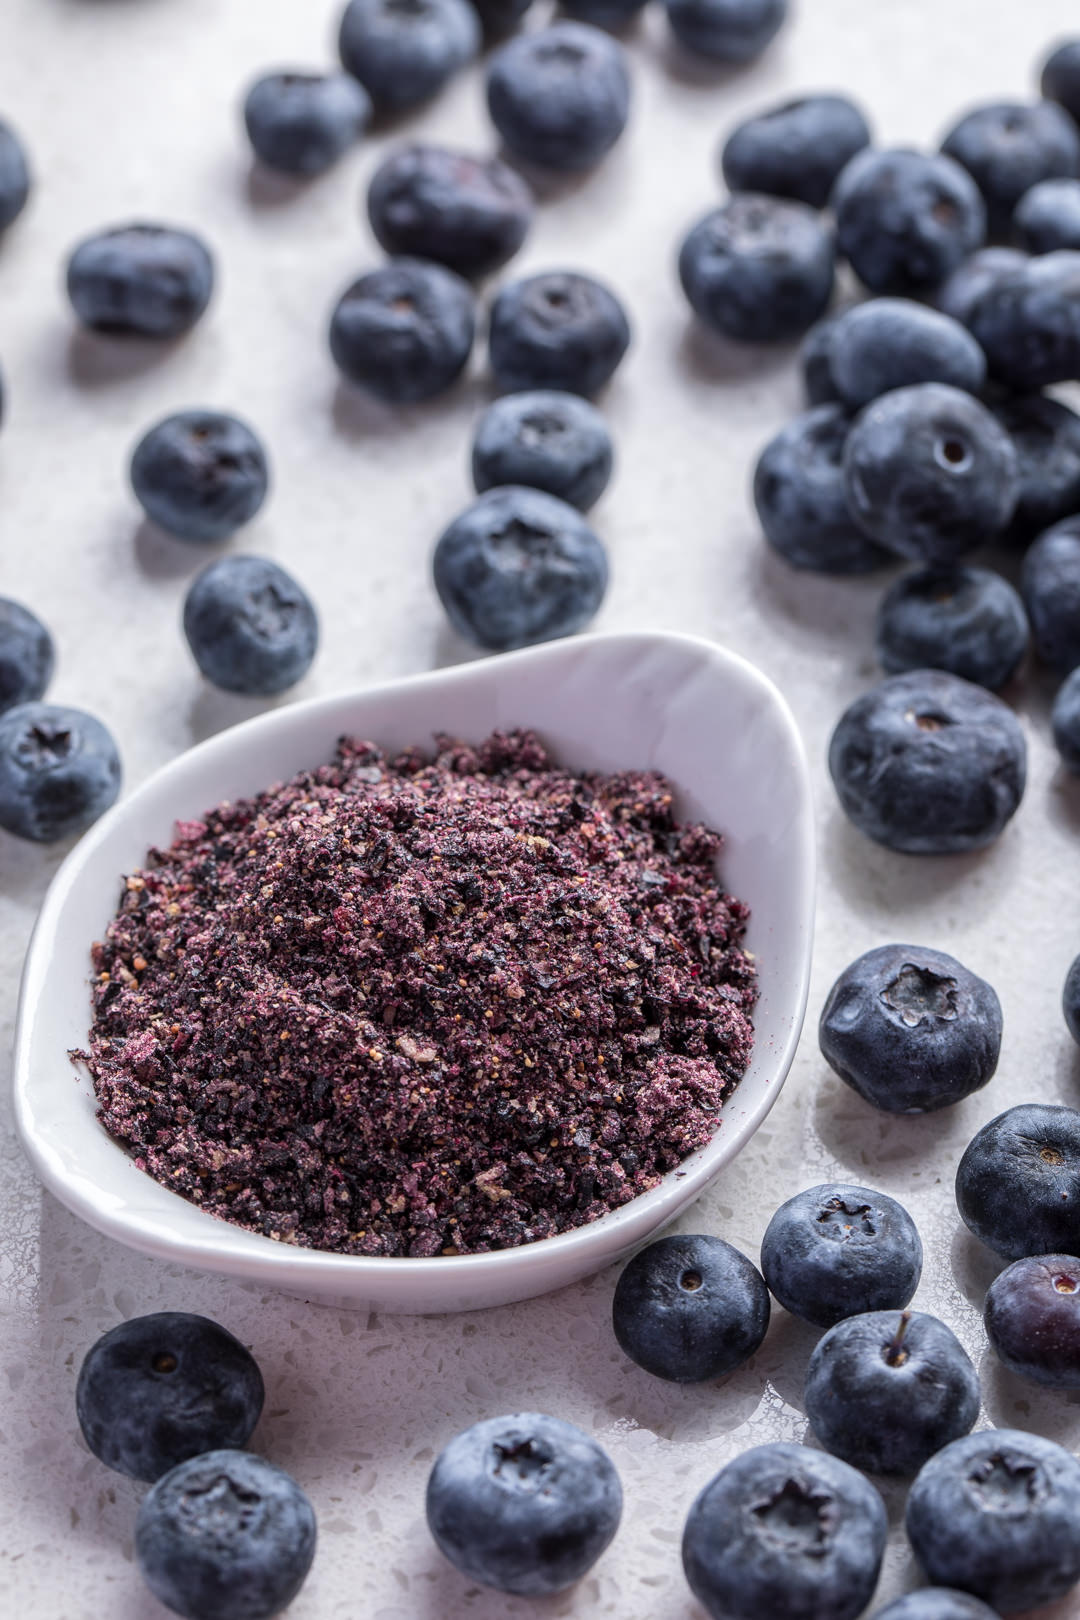
- 30 grams freeze dried blueberries
- polycarbonate chocolate candy mold, click here for options
- cheesecloth, to buff mold
- Process freeze dried blueberries into a fine powder.
- Warm heavy cream over medium low heat in small saucepan.
- Pour warm cream over white chocolate and allow to sit for about 3-4 minutes to soften.
- Gently stir with a rubber spatula until chocolate is completely incorporated.
- Mix in blueberry powder.
- Transfer to a piping bag and chill while tempering the chocolate. This can be prepared quite far in advance, but will need to be kneaded in the bag to make it pip able if it cools too much.
- If the mold has never been used, you will want to rub a very small amount of the cheesecloth onto the raw cocoa butter before using it to buff the individual compartments.
- Once the mold is used properly, you should be able to simply buff. Much like cast iron, the mold will become seasoned with each use. If you have to wash the mold (ideally, simply blow it out and buff to keep clean.
- Buff each individual mold compartment, getting every corner, if your mold shape has them. Buff well. This is time-consuming but critical to a shiny finish and good release of the candy.
- Once buffed, set aside.
- If you would like to brush a design on the mold, slightly warm the tablespoons of cocoa butter. I microwave mine for 15-30 seconds and stir. Do not overheat.
- Add coloring and mix until completely incorporated. Warm as necessary if it solidifies.
- Using a clean pastry brush, brush some of the colored cocoa butter onto the inside of the molds. It may be easier to allow the butter to slightly cool after warming to apply a better coat.
- Decorate all of the molds and set aside.
- Chop all chocolate into very small pieces.
- Before beginning, please take some time to familiarize yourself with the process of tempering chocolate. You can find links in the written content of this blog post for more information.
- Begin by warming the 500 grams of chocolate over a double boiler very slowly to 46-48 degrees C / 118 F.
- Remove from heat and cool chocolate to 27-28 C / 80 F by slowly incorporating the 150 grams of additional chocolate, stirring constantly. This may take a while to cool, as chocolate holds its heat for quite a while. Be patient and continue to stir.
- Place back above a very low simmer and warm melted chocolate to a final temperature of 31-32 C / 88-90 F. Be VERY careful to not exceed this temperature, as you will have to start the process over if so.
- Hold chocolate at this final temperature. I generally remove chocolate from the heat, as it holds for a while. Replace and stir, checking the temperature often as needed.
- Clean a large surface or complete over a baking sheet.
- Fill the chocolate molds with the tempered warm chocolate (at its final temperature).
- Tap molds to ensure there are no air bubbles.
- Flip mold over and allow chocolate to exit, leaving a very thin coating inside the molds.
- Tap the outside of the mold with a rolling pin or something similar. Get as much chocolate out as possible to ensure a thin, crisp shell.
- While inverted, use a pastry or dough scraper to push away the chocolate, leaving you with only the inside of the shells being coated. Flip right side up and make sure excess chocolate is scraped off. It is important to remove all excess chocolate so that the candies all release individually.
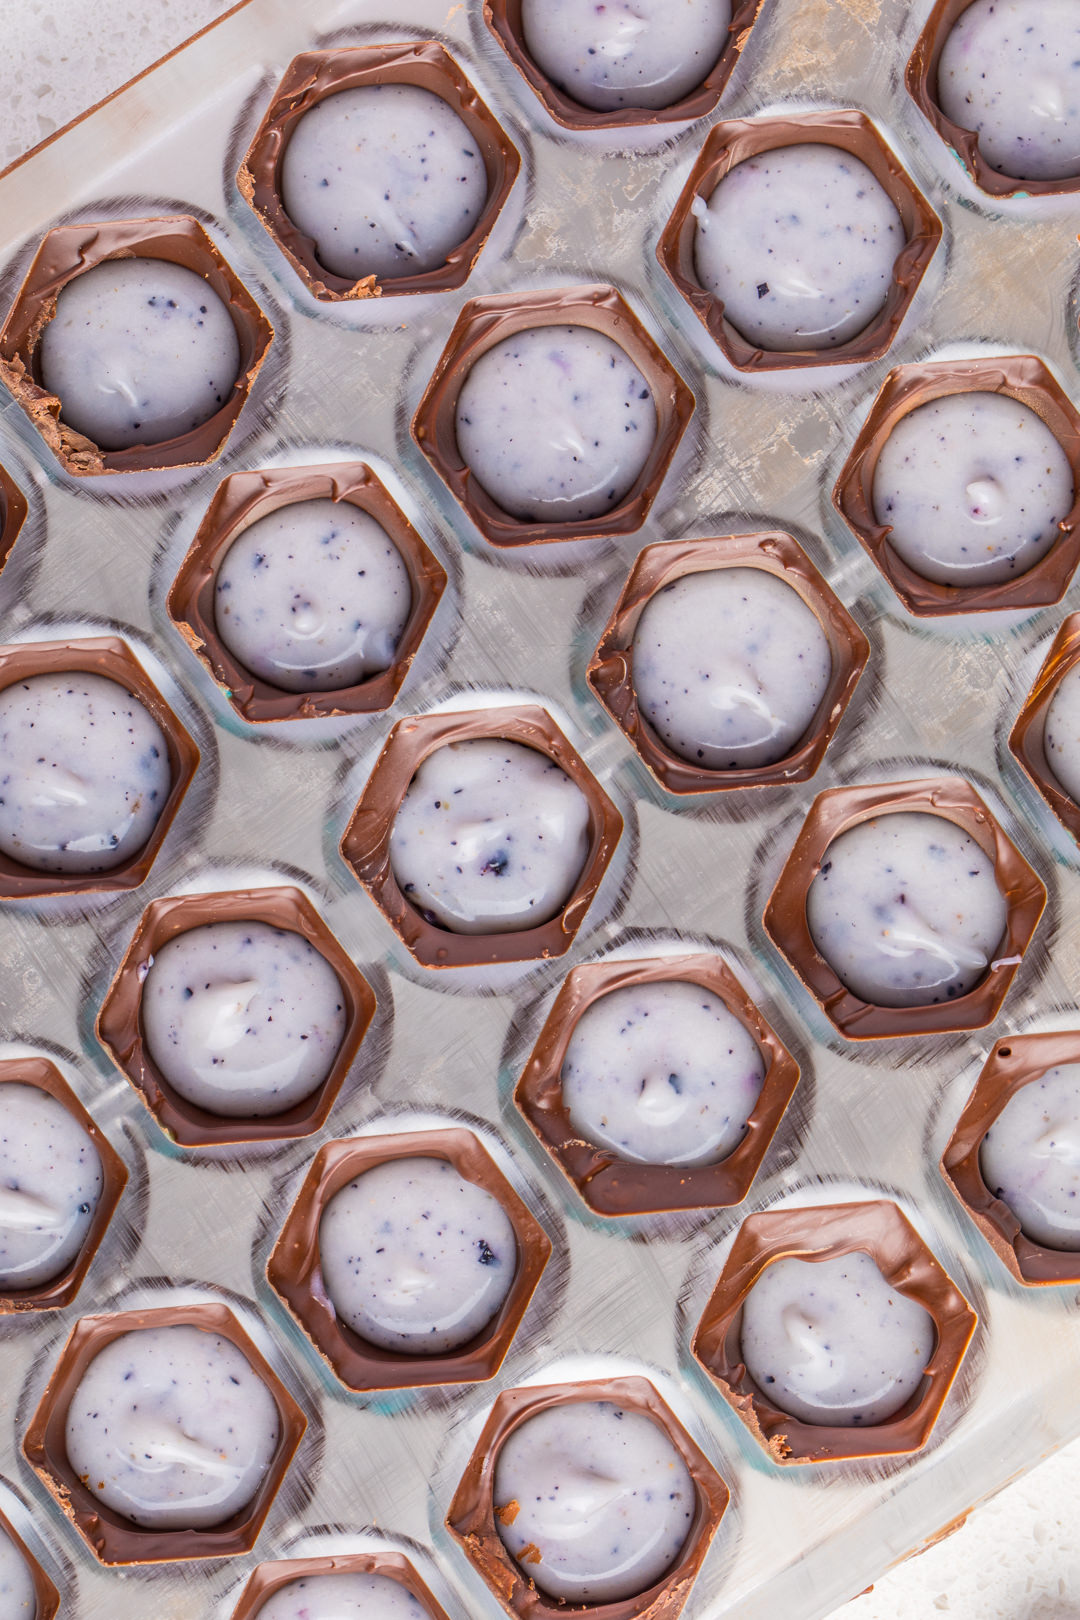
- Pipe ganache into the hardened molds. Fill about ¾ of the mold. If you add too much, you will not be able to get a good seal and the candy will leak or crack.
- Leftover chocolate (there will be a lot - you will have a hard time heating less quantity) can be kept and used for the same process again later. It may 'bloom', or form a cloudy exterior. This is normal and will disappear when re-tempered.
- To seal the candies, I find it easier to place the chocolate (still help at its final temperature) into a piping bag.
- Pipe into each mold and again scrape across the mold to clear excess chocolate.
- Tap mold to release air bubbles and fill in any gaps with additional chocolate.
- Scrape again and allow to rest to completely harden.
- If rushed, can chill the candy for 15-20 minutes.
- To check and see if the candy is ready, you can look on the underside (which will be the top of the candy when released). You should see that the chocolate had released from the mold. If you see spots that have not, those were likely areas not buffed well or you have issues with your chocolate not being properly tempered.
- If you see many or all of the shells are not hardened and released, you can try to chill for an additional 15-20 minutes.
- To release candy, you will flip and bang the mold onto a clean surface very quickly. Don't be too gently, and try to hit it without it being at an angle. You want it to slap down with the entire bottom side of the candies hitting the surface at once.
- The candies should release if everything was done properly.
- That's all! Enjoy your chocolate. Best stored in airtight container chilled. The will fade slightly if kept for a long period.
- Find more recipes on SouthernFatty.com.


Brittany
How did you get the blue color to be so vibrant on the dark chocolate?
Phillip @ SouthernFATTY.com
That is tempered colored cocoa butter. It’s the step labeled “Decorating Outer Shells”. Good luck!
-Phillip
Have a photo to share? Tag us on social using @southernfatty / #southernfatty!
Nona
What type of chocolate do you recommend for professional truffle making and where do you purchase bulk?
Thank you
Phillip @ SouthernFATTY.com
I love Callebaut chocolate. Pastry Depot is where I usually buy mine. They have a lot of great options. ell them I sent ya!
-Phillip
Have a photo to share? Tag us on social using @southernfatty / #southernfatty!
Mary
Please lemon ganache and lemon caramel filling
Chrishna
I would prefer to just order these from you! How much?
Cindi
How about cherry…always goes good with Choco
Phillip @ SouthernFATTY.com
Yessss! Love cherry combo.
Annie
Hi! I made these truffles yesterday and they were yummy! I used the cocoa butter and food coloring powder to decorate them as directed; however, the blue coloring was very faint…almost unnoticeable. Wondering if the dark chocolate was too warm when I poured it in the mold causing the previously set blue cocoa butter to melt into the dark chocolate? Ugh! Any tips to make the decoration stay vibrant? Thanks!
Phillip @ SouthernFATTY.com
Do you know what temperature you poured the dark chocolate at? That could definitely be the issue. Typically dark chocolate should be used at 88 F.
-Phillip
Have a photo to share? Tag us on social using @southernfatty / #southernfatty!
Dottie Cesario
I would love if all recipes incuded tips on storage and shelf life.
What is best way to store if I want to make many for the holidays?
what is shelf life on truffles?
thanks,
Phillip @ SouthernFATTY.com
Great feedback! I’ll work on updating with that info for all of my recipes. They keep very well in a container in the fridge. You may notice some blooming (where the chocolate turns cloudy). That is perfectly edible, but just not as pretty. When that happens is dependent on how well you temper the chocolate.
-Phillip
Have a photo to share? Tag us on social using @southernfatty / #southernfatty!
Jennine Quiring
Thank you for the great hints. I have been entering baked goods at the California state fair. This year I attempted a filled chocolate. I got a blue ribbon with a tart and sweet cherry with balsamic vinegar.
Phillip @ SouthernFATTY.com
Awesome!
-Phillip
Have a photo to share? Tag us on social using @southernfatty / #southernfatty!
Simran tiwari
Firstly, Your chocolates look amazing!!
Is there a specific kind of cocoa butter we should we using for decorating the outer shell? And do we need to temper the cocoa butter as well?
Phillip @ SouthernFATTY.com
Thanks! I used raw cocoa butter (THIS is the one I like that is easy to get) that is colored with a fat-soluble food color. Regular food dye will not work if water or other base. Colored cocoa butter is a great alternative if unsure. I did not temper the cocoa butter for the shell buffing and decoration. Typically if you warm it to melt gently, it should be ok. With that said, you certainly can temper the cocoa butter for a better shine and result. I would consider this if using a lot of the design on the outer shell.
Enjoy!
-Phillip
Have a photo to share? Tag us on social using @southernfatty / #southernfatty!
Sarah
What is your favourite brand of chocolate to use for maximum flavour and Shine?
Phillip @ SouthernFATTY.com
I’m not exactly a purist when it comes to brands for chocolate, but I am very picky about being 100% sure that you are using real chocolate. Many brands sell products that aren’t true chocolate, and are instead compounds of oil-based blends. Look for cocoa butter instead of oils in the ingredient lists. (PS – There is an interesting article from the late 80’s on some of this very topic via the Chicago Tribune if you are feeling nerdy sometime and want to see how this has progressed in production models.)
I do find myself using a few different brands the most — Vlarhona couverture is quite excellent. THIS blend is a favorite dark of mine. Callebaut make a wonderful white chocolate that I love. All of this chocolate is quite expensive, but worth the cost if you are focusing on chocolate like you are in these truffles. If you are baking with it, you could lean towards a more grocery-friendly version like a good Ghirardeli.
Shine wise — Using polycarbonate molds (like THESE) is really key outside of mastering the tempering process. I always buff my polycarbonate molds with a bit of cocoa butter and lint-free cheesecloth. It takes some time, but gives suuuuch good results. Silicone molds will work, but you just can’t get that same shine. — Good luck! Let me know how it goes.
Angelica
I tried making these last week and one of the biggest problems I had was capping the chocolate. All of the filling just spilled out. I chilled the mold beforehand, but the filling just didn’t seem to harden at all. Do you have any tips?
Chef Belal
Filling is not suppose to harden. You are over filling the bonbons. Use a pipping bag to portion correctly and tap ever so gently to flatten the filling before capping the bonbons.
Phillip @ SouthernFATTY.com
Good advice!
Hannah
Hi! I love this post, I’ve been looking for something like this everywhere but all the truffle recipes are for hand rolled and dipped in chocolate. So what happens if you use silicone molds? Would you just risk making marks on the shiny finish when you push them out? Just seems to be a lot more choice for shapes with silicone molds…
Thanks!
Phillip @ SouthernFATTY.com
You can certainly make these in silicone molds, but unfortunately you just won’t get that same great shine finish that you expect in a filled truffle/bon-bon. Polycarbonate molds are def best. ?You may try melting some cocoa butter and putting a bit of the warm cocoa butter on a cloth and rubbing the silicone molds. That helps with shine. They’ll taste great either way.
Shruti Tiwari
Looks tempting!! Can i make these without ganache? I am looking for easy recipe for blueberry truffles.
Phillip @ SouthernFATTY.com
You could really fill them with anything, I think. As long as it is solid enough that the chocolate bottom layer will not sink in and still seal them. I’ve used jam and then chilled them before applying the bottoms, etc. Enjoy!
Helena
Those look absolutely wonderful!!! I am admittedly going about this very amateurishly with unrealistic expectations … however … is there a particular reason why cocoa butter is the right oil? Would coconut oil work as well? (guess which one I happen to already have …)
Thanks so much!
Phillip @ SouthernFATTY.com
Thanks, Helena! — As with most pastry question answers…. it depends. The cocoa butter is used because it has a melting point of about 95 F. Coconut oil is at 76 F. You couldn’t decorate the shells with colored coconut oil like these are, but if you wanted to just try making truffles without as much involvement (good for a first time, etc.), you could probably use a tiny bit of coconut oil to buff the chocolate molds instead of cocoa butter. You won’t get that classic shine that cocoa butter gives, because it has a different structure chemically and doesn’t crystallize in the same way that chocolate or cocoa does. If you want to just try your hand at making truffles without much experience, I don’t see why you couldn’t use a bit to help with releasing the molds and continue without cocoa butter. The most important thing is going to be focusing on the tempering of the chocolate. A well-tempered chocolate will come out of the molds easily even without buffing the molds, but just may not be terribly shiny.
Let me know how it goes!
Mary
I bought myself a tempering machine years ago. Best money I’ve ever spent for making candy. I do a mean Amaretto Truffle.
Phillip @ SouthernFATTY.com
I’ve really thought about doing that!
Lindsay
So freaking pretty. I envy you and your patience to temper chocolate.
Phillip @ SouthernFATTY.com
I only attempt to after a few ‘calming’ drinks.
Laura (A Beautiful Plate)
These are amazing!!!! Gosh, I never learned the patience to temper chocolate, even though its SUCH a useful pastry skill. I just hate doing it, but these would make it absolutely worth it!
Phillip @ SouthernFATTY.com
Thaaaaaaanks, Laura! I’ve been known to have quit the mean temper. *hair flip*
Angela Roberts
I”m honestly impressed. I haven’t even attempted anything like this ever. But now I want to!
You’re the cat’s meow!
Phillip @ SouthernFATTY.com
D’awww, thanks!
PS- You make a mean gluten-free cupcake! Had both from the sale.